The essentials
- Count the holes in your sink and measure clearance above it before buying; a deck plate can cover unused holes.
- A basin wrench, adjustable wrench, plumber’s tape, and putty or silicone cover most faucet swaps.
- Turn off the shutoff valves, open the faucet to drain pressure, and photograph the connections before disconnecting anything.
- Hand-tighten connections first, then use tools gently; over-tightening can strip threads or crack fittings.
- Call a licensed plumber for stuck valves, welded supply lines, or missing shutoffs.
Swapping a kitchen faucet looks harder than it is, mostly because the work happens in a dark cabinet where you cannot see your own hands. In reality, this is one of the most approachable plumbing jobs in the house. The connections are standard, the tools are basic, and most people finish in an afternoon.
Can You Replace a Faucet Yourself?
In most kitchens, yes. The job has two halves: the top, where you set the new faucet in place, and the bottom, where you tighten mounting nuts and hook up supply lines. Neither half needs special skills, only patience and a basin wrench, a long-handled tool made to reach the nuts directly under the faucet.
Run a few quick checks before you commit:
- The shutoff valves under the sink turn smoothly and fully stop the water.
- There is room in the cabinet to get your head and shoulders under the sink.
- The old supply lines are standard threaded fittings. Lines that are welded to the old faucet, or that show damage, need to be replaced along with it.
If any of those checks fail, the job is not impossible, but it moves from beginner territory toward a licensed plumber.
Tools and Materials You Need
Check the new faucet’s box before you buy extras, because many models include the gaskets and hardware you need.
| Item | What it does |
|---|---|
| Basin wrench | Reaches the mounting nut under the faucet, a spot ordinary wrenches cannot |
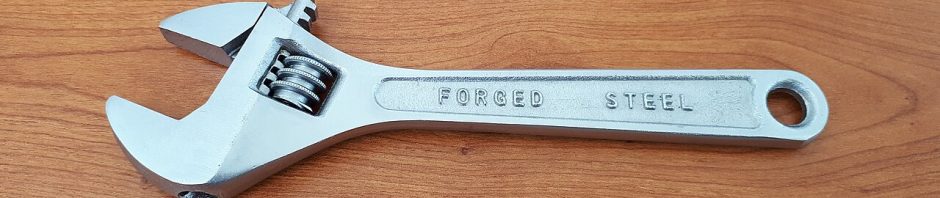
| Adjustable wrench | Disconnects the hot and cold supply lines |
| Plumber’s tape | Wraps threaded connections for a better seal |
| Plumber’s putty or silicone | Seals the faucet base or deck plate to the sink |
| Bucket and towels | Catches water left in the lines |
| Flashlight or headlamp | Lights the cramped space under the sink |
If you are installing a smart faucet, plan for batteries, and possibly a drill with the right-sized bit.
Choosing a Faucet: Holes, Spout Height and Handle Style
Start with the sink, not the faucet. Count the holes in the sink deck: there may be one, two, three, or four, set close together (called center-set) or spread apart (called widespread). Buy a faucet that matches, or choose a single-hole model with a deck plate, a flat trim piece that covers the unused holes for a finished look.
Spout style matters as much as looks:
- Pull-down faucets have a tall, high-arc spout and a spray head that pulls straight down into the bowl. They pair well with deep, single-bowl sinks and large cookware.
- Pull-out faucets have a lower profile, and the spray head pulls out toward you. They suit smaller sinks and kitchens with cabinets, shelves, or a windowsill close above the sink.
Measure the space above the sink and the spout reach before you order, so the arc clears the window trim and the water lands in the bowl.
For handles, a single handle is easier to operate one-handed, while two separate handles allow precise hot and cold adjustments and a more traditional, symmetrical look.
One shopping note: kitchen faucets are not eligible for the EPA’s WaterSense label, a certification found on products such as bathroom sink faucets. That does not put efficiency off the table. The EPA encourages shoppers to consider water use for any product it does not label.
Shutting Off the Water and Removing the Old Faucet
Empty the cabinet, then unplug the garbage disposal if you have one. Turn both shutoff valves under the sink clockwise until they stop, then open the faucet to drain the water left in the lines and release pressure. Keep the bucket underneath anyway, because a little water always comes out.
Disconnect the supply lines with an adjustable wrench. Before you unscrew anything, take a phone photo of the connections so you can compare them during reassembly.
Use the basin wrench to loosen the nut holding the faucet tailpiece, then lift the old faucet out from above. A second person holding the faucet steady makes this easier. Scrape away old putty and debris so the new faucet sits on a clean surface.
Installing the New Faucet and Checking for Leaks
Set the new faucet in place following its instructions. For a three-hole sink, place the gasket or trim ring over the holes and set the deck plate with plumber’s putty if the manufacturer recommends it. Feed the faucet’s lines down through the hole or holes, then thread the mounting nuts on from underneath and tighten them.
Pro tip
Hand-tighten connections first, then use tools for a final quarter turn. Excessive force can strip threads, crack fittings, or damage the faucet.
If the faucet has a pull-down sprayer, attach the weight that retracts the hose and confirm it can move freely under the sink. Connect the supply lines to the shut-off valves, hot on the left and cold on the right, adding plumber’s tape to threaded connections where it helps.
Turn the valves on slowly and run the water. Check every connection for drips and tighten slightly if you find any. Then dry the cabinet floor and look again an hour later. The EPA suggests a broader test too: read your water meter when nothing is running, wait two hours, and read it again. A changed reading usually means a leak somewhere in the house. Fix leaks as soon as you spot them, and fold fixture checks into seasonal routines like A Fall Home Maintenance Checklist.
When to Call a Licensed Plumber
Bring in a professional in these situations:
- The shutoff valves will not turn, or they leak when closed. A stuck valve may require shutting off water at the main.
- The supply lines are welded to the old faucet or badly corroded.
- There are no shutoff valves under the sink at all.
- The job calls for cutting new holes in a countertop, or you find water damage inside the cabinet.
A plumber handles these quickly, and a service call usually costs less than repairing damage from a flooded cabinet.
Ready to start? Take one small step tonight: open the cabinet, count the holes in your sink, and try the shutoff valves. Those three checks tell you almost everything you need to know before you shop.
Related guides
- How to Re-Caulk a Bathtub or Shower: sealing technique for the other wet areas in your home.
- How to Patch Small Holes in Drywall: wall fixes that often come up during kitchen upgrades.
Common questions
How long does it take to replace a kitchen faucet?
Most first-timers finish in an afternoon. The steps themselves are straightforward; the time goes into reaching the nuts under the sink and checking for leaks afterward.
What is a basin wrench?
It is a long-handled tool with a swiveling jaw made to reach the mounting nut directly under the faucet, where ordinary wrenches cannot fit.
Can I install a single-hole faucet in a three-hole sink?
Yes. Use a deck plate, a flat trim piece that covers the extra holes, for a clean, finished look.
Do I need to shut off water at the main?
Usually not, because the valves under the sink handle it. If those valves will not turn or leak when closed, that is a job for a plumber.
This guide is general information, not professional advice. Follow the manufacturer’s instructions and your local building codes, and hire a licensed professional for electrical, gas, structural or roofing work.