The essentials
- Fill valves usually last about five to seven years, and hard or sediment-heavy water can shorten that.
- If water spills into the overflow tube, the fill valve is at fault; if the level sits below the tube, look at the flapper first.
- Set the water level about a half inch to one inch below the top of the overflow tube, or at the manufacturer’s marked line.
- Tighten the fill valve locknut a half turn past hand tight and connect the supply line hand tight only, with no tape or sealant.
- Fixing easy household leaks can save about 10 percent on water bills, so a running toilet is worth fixing promptly.
A toilet that runs, hisses or takes forever to refill usually has a tired fill valve. The good news is that this is one of the most approachable plumbing jobs in the house: the parts are inexpensive, the steps are few and the water in the tank is as clean as what comes out of your faucet. Set aside an hour and you can quiet the bathroom and stop wasting water at the same time, which matters, because the EPA notes that fixing easily corrected household leaks can save homeowners about 10 percent on their water bills.
Signs Your Fill Valve Needs Replacing
Fill valves typically last five to seven years, and water with a lot of sediment can build up inside the valve and shorten its life. Watch for these symptoms:
- The toilet runs constantly. The fill valve that lets water into the tank is not closing completely.
- The tank refills on its own every few minutes or hours, a sign of intermittent water loss.
- The valve is noisy. A whining, screeching or chattering sound during refill often points to internal wear or sediment.
- The tank fills slowly even though the supply valve is fully open.
Before you buy anything, confirm the fill valve is actually the culprit. Lift the tank lid and look at the overflow tube, the vertical pipe in the middle of the tank. If water is spilling into the top of the tube, the fill valve is letting the tank overfill and that is your problem. If the water level sits below the top of the tube and the toilet still runs, the flapper at the bottom of the tank is probably leaking instead, and a flapper costs less and takes ten minutes to swap.
A quick food coloring test settles the flapper question. Put a few drops of coloring in the tank and wait 10 minutes without flushing. If color shows up in the bowl, the flapper is leaking. Flush right afterward so the tank does not stain.
Tools and Materials You Need
This job needs very little:
- A new fill valve sized for your toilet (universal valves fit most tanks; low-profile models exist for compact tanks)
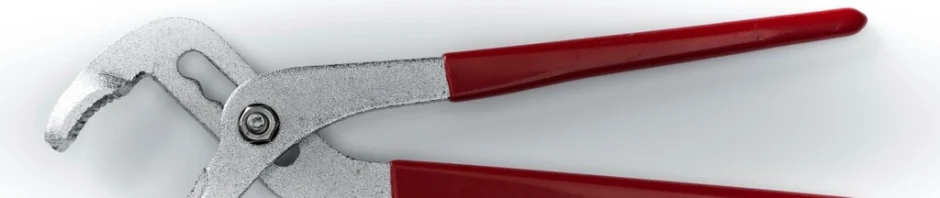
- An adjustable wrench or channel-lock pliers
- A sponge and a small bucket or bowl
- Old towels
- A hacksaw, only if you need to shorten the overflow tube (see Step 3)
Skip the plumber’s tape. The supply connection to a fill valve is a compression fitting meant to be tightened by hand, and sealants can interfere with the seal.
Pro tip
Buy the fill valve before you start the job and read its instruction sheet. Valves differ in how the height adjusts and how the refill tube clips on, and knowing your model’s quirks ahead of time makes the wet part of the job go faster.
Step 1: Shut Off the Water and Drain the Tank
Find the shut-off valve on the supply line coming out of the wall or floor below the tank. Turn it clockwise until it stops. If the valve has not been touched in years and will not budge, do not force it hard enough to snap the stem; that is a good moment to reconsider and call a plumber.
With the water off, flush the toilet and hold the handle down to drain as much water as possible. Then sponge out what remains into the bucket. Getting the tank mostly dry keeps water off the floor when you pull the old valve.
Step 2: Remove the Old Fill Valve
First, disconnect the water supply line where it attaches to the bottom of the fill valve, under the tank. Have the towel ready, because a little water will drain out. If the coupling is stubborn, hold the fill valve stem above it with pliers so you do not twist the valve inside the tank.
Next, unscrew the fill valve’s mounting nut, the large plastic nut on the shank underneath the tank, and lift the old valve out. Some mounting nuts loosen by hand; others need the wrench. Take the old valve with you to the hardware store if you are unsure what to buy, though most universal replacements will fit.
Step 3: Size and Adjust the New Valve
This is the step people rush, and it is the one that decides whether the finished toilet flushes well. The valve’s height controls how much water the tank holds:
- Too high, and the valve will not shut off, so the tank keeps running or overflows into the tube.
- Too low, and there will not be enough water in the tank, which means weak or incomplete flushes.
Extend the new valve to near its full height, then hold it in the tank next to the overflow tube. Set it so the water level mark on the valve sits about a half inch below the top of the overflow tube, then lock the adjustment (most valves twist to lock; follow the sheet).
If the valve is at its maximum height and the overflow tube still rises above the valve’s critical level mark, do not force it. Instead, shorten the overflow tube with a hacksaw so it ends one inch below the critical level mark. The critical level mark, often labeled C.L., must sit above the top of the overflow tube or the tank can siphon water back through the valve.
Step 4: Install the New Valve
Lower the valve into the tank hole, angled about 45 degrees from the back of the tank. That angle is not fussy decoration; it keeps the refill tube on a straight path to the overflow tube, which prevents kinks later.
Hold the valve upright from inside the tank while you thread the mounting nut onto the shank from below, then tighten it a half turn past hand tight with the wrench. That is enough. Cranking it down can crack the tank, and a cracked tank means a new toilet, because that is the only reliable fix.
Step 5: Attach the Refill Tube and Reconnect the Supply
Clip one end of the small refill tube to the nipple on the fill valve and the other end to the angle adapter that clips onto the overflow tube. Cut the tube shorter if it would sag or kink. The refill tube sends a small stream into the overflow tube during a flush to refill the bowl, which matters because the water sitting in the bowl is the barrier that keeps sewer gas out of your house. Our explainer on how a P-trap works covers the same principle for sinks and tubs.
Then reconnect the supply line to the bottom of the fill valve and tighten it by hand only. No tape, no sealant, no wrench muscle.
Step 6: Test for Leaks and Set the Water Line
Turn the supply valve on slowly and watch the tank fill. It is normal for water to flow from a few spots as the valve calibrates itself on the first fill, but after the tank has filled once, everything should be dry. Run a finger around the mounting nut and the supply connection under the tank. If the fill valve area drips, try tightening the locknut a little more; if the supply connection drips, hand-tighten it a quarter turn.
Now set the final water level. Flush and let the tank refill, then check where the water settles. The manufacturer’s line, usually stamped on the overflow tube or inside the tank, is the level the toilet was engineered to use. If there is no line, aim for a half inch to one inch below the top of the overflow tube. Turn the adjustment screw or slide the float to raise or lower the level, flush again and repeat until it is right. A level set too high wastes water and risks overflow; too low and you get weak flushes and a bowl that sits low, which can let odors into the room.
One more check: confirm the fill tube sits so its outlet is above the water line, trimming it back if needed, so the tank cannot siphon through it.
When to Call a Plumber Instead
Most fill valve swaps are straightforward, but some situations call for a licensed plumber:
- The shut-off valve under the toilet will not close or leaks when you turn it. You need the main supply shut off, and the toilet’s valve should be replaced.
- Water leaks from the tank bolts, the flush valve seat or a crack in the tank. Those are different repairs, and a cracked tank generally means replacing the toilet.
- You suspect a pressure problem. Toilet fixtures work best with incoming pressure between 45 and 60 psi. If yours is much higher or lower, a plumber can test with a pressure gauge and adjust or install a pressure-regulating valve.
- The toilet still runs after a new valve and flapper. There may be an issue with the flush valve seat or the tank-to-bowl connection that is harder to diagnose.
Once the new valve is in, keep an eye on it. The EPA recommends checking fixtures regularly for leaks, and comparing your water bill to the same month the year before is a simple way to catch a slow leak you can’t hear. A family of four using more than 12,000 gallons in a winter month, when outdoor watering is off the table, likely has a serious leak somewhere in the home.
Related guides
- Getting Started With Replacing a Kitchen Faucet uses the same shut-off, drain and reconnect rhythm if you want to tackle another fixture.
- 8 Ideas for a Small Bathroom Update suggests easy improvements once the plumbing in your bathroom is quiet and leak-free.
- 7 Ways to Lower Your Water Heating Bill covers the other big water-using systems in your home.
Common questions
How do I know whether the fill valve or the flapper is the problem?
Look at the overflow tube inside the tank. Water spilling into the tube points to the fill valve; a level below the top of the tube usually means the flapper is leaking. A food coloring test in the tank can confirm a flapper leak if color appears in the bowl after 10 minutes.
How long does a toilet fill valve last?
Manufacturers generally figure on five to seven years of service, though sediment in your water supply can shorten that. If the valve grows noisy, runs constantly or refills slowly, replacement is normal maintenance.
Where should the water level sit in the tank?
Aim for the line stamped inside the tank or on the overflow tube if your toilet has one. If there is no line, set the level about a half inch to one inch below the top of the overflow tube.
Can I replace a fill valve without shutting off the water to the whole house?
Yes, in most cases. Every toilet has its own shut-off valve on the supply line below the tank. If that valve leaks or will not close, shut off the home’s main supply and plan to replace the toilet’s valve too.
This guide is general information, not professional advice. Follow the manufacturer’s instructions and your local building codes, and hire a licensed professional for electrical, gas, structural or roofing work.